


Gallery
Upgrade your master shower into a spa-style retreat you’ll enjoy every day. We design and build custom master showers with premium tile, modern fixtures, waterproof systems, and clean, long-lasting finishes.
From elegant glass enclosures to heated floors, niches, benches, and ceiling tile, every detail is done right. Whether you want a sleek modern look or a timeless classic style, our expert craftsmanship delivers comfort, durability, and beauty that adds real value to your home.


Our Projects
Explore our stunning tile installation work.
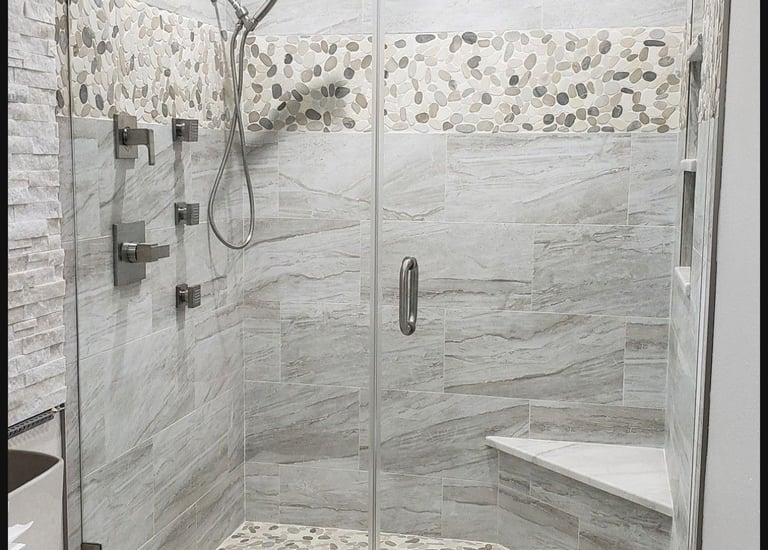
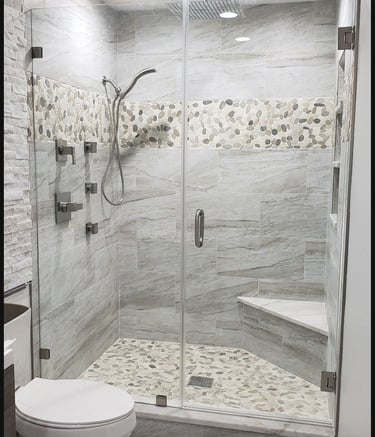
Residential Spaces
Elegant tile work for homes.
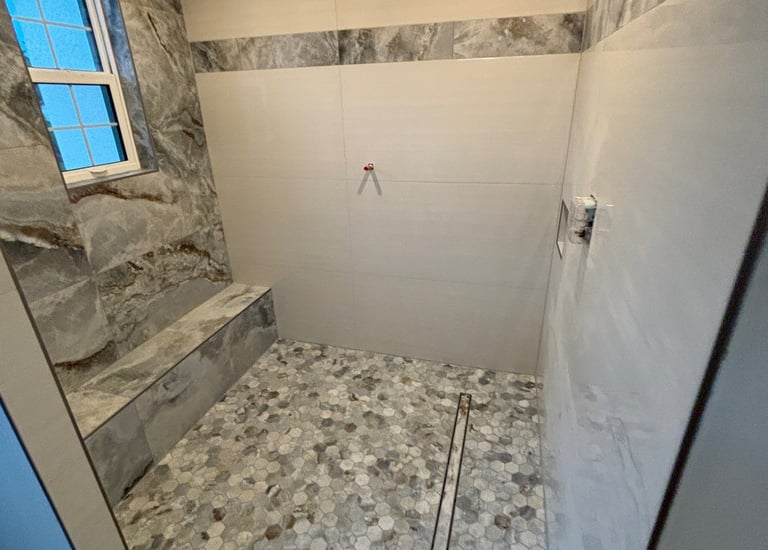
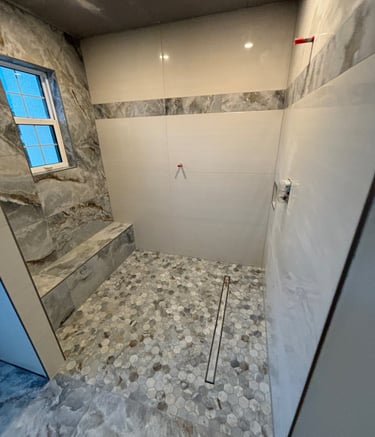


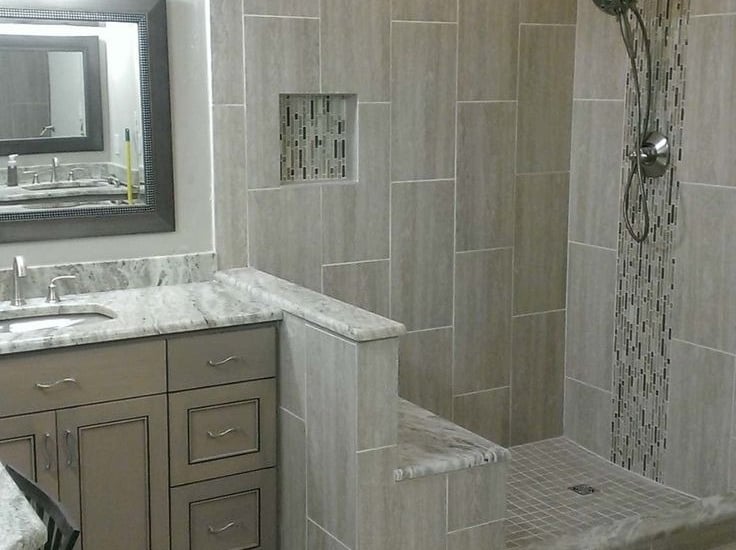
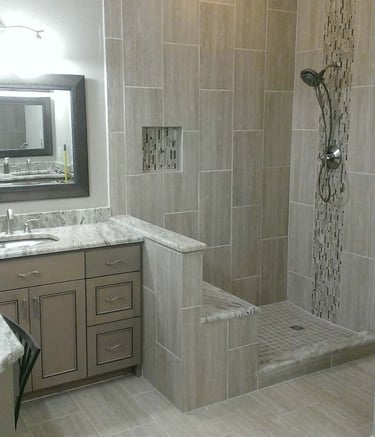
The tile installation transformed my space beautifully and exceeded my expectations!
Emily R.
★★★★★
Shower Tile Installer in Sarasota:
What Homeowners Should Know
A new tiled shower can completely change the look and feel of a bathroom. But attractive tile is only one part of a successful shower.
The installation behind the tile matters just as much.
A shower has to manage water, moisture, movement, drainage, and repeated daily use. Poor preparation can lead to loose tiles, cracked grout, staining, mold growth, or water damage behind the finished surface. In other words, a beautiful shower can still be a bad shower if it was not built correctly underneath.
That is why choosing the right shower tile installer in Sarasota is an important decision.
Whether you are replacing outdated shower tile, building a new walk-in shower, or completing a full bathroom remodel, this guide explains what to look for, what questions to ask, which materials make sense, how the installation process works, and where homeowners can save money without sacrificing quality.
Expert tip: When comparing tile installers, do not judge the job only by the finished tile. Ask how the shower is waterproofed, how the substrate is prepared, how the drain is handled, and how corners and penetrations are sealed.
Why Choosing the Right Shower Tile Installer in Sarasota Matters
Shower tile installation is more complicated than installing tile on a dry interior wall.
A shower constantly encounters water. The assembly underneath the tile must control that moisture and direct it toward the drain rather than allowing it to penetrate vulnerable building materials.
Tile and grout themselves should not be treated as the shower's waterproofing system. Waterproofing must be designed and installed behind or beneath the tile as part of the overall shower assembly. Industry guidance from waterproofing-system manufacturers emphasizes the same basic principle: the tile is the finish surface; waterproofing is what protects the structure.
A qualified installer should therefore understand more than tile patterns.
They should know how to handle:
Shower pans and bases
Waterproofing membranes
Shower niches
Corners and changes of plane
Plumbing penetrations
Shower valves
Curbs and benches
Drain assemblies
Substrate preparation
Large-format tile
Grout and movement joints
Proper tile layout and cuts
For Sarasota homeowners, local knowledge can also matter when a project involves plumbing, electrical work, structural changes, or other remodeling activities that may trigger permitting requirements.
What Does a Shower Tile Installer Actually Do?
A professional shower tile installer may handle much more than sticking tile to a wall.
The exact scope varies by contractor and project, but a complete shower tile installation can include several stages.
1. Evaluate the existing shower
The installer examines the existing tile, substrate, shower base, drain, plumbing access, and surrounding areas.
If the existing shower has water damage or previous installation problems, covering it with new tile may not solve the underlying issue.
2. Remove old materials
Depending on the project, demolition may involve removing:
Existing tile
Backer board
Shower pan
Old waterproofing
Damaged drywall
Adhesives
Grout
Fixtures
The installer should identify hidden problems before rebuilding.
3. Prepare the substrate
Tile needs a stable, properly prepared surface.
Uneven walls can create lippage, poor tile alignment, inconsistent grout joints, and difficulty installing large-format tile.
4. Build the waterproofing system
This is one of the most important stages.
The shower's waterproofing system should be compatible with the selected installation method and installed according to the system manufacturer's requirements.
5. Establish the tile layout
The installer determines where the tile starts, where cuts will occur, how corners line up, and how decorative features will be positioned.
6. Install the tile
Tile is cut, positioned, bonded, leveled, and aligned.
7. Grout and finish
After the appropriate setting period, grout is installed and the shower receives its final finishing work.
The installer may also complete silicone joints, trim, niche edges, thresholds, and other details.
Why Shower Waterproofing Matters More Than the Tile
If there is one concept every homeowner should understand before hiring a shower tile installer, it is this:
Tile makes the shower look finished. Waterproofing makes the shower function.
Tiles and grout are not a substitute for a properly designed waterproofing system. Manufacturers of shower systems specifically distinguish the decorative tile surface from the waterproof assembly underneath it.
A shower waterproofing system may use different approaches, including traditional shower assemblies or bonded waterproofing systems.
The important point is not that there is only one correct product.
The important point is that the complete system must work together.
That includes transitions around:
The shower floor
Walls
Corners
Bench surfaces
Niches
Plumbing penetrations
Drain connections
Curbs
A good installer should be able to explain the waterproofing method in plain English.
If a contractor cannot clearly explain what protects the shower framing from water, that should be a warning sign.
Should the shower be water-tested?
Depending on the shower system and project requirements, a water test may be appropriate before tile is installed. For example, Schluter's installation guidance recommends testing a shower assembly before setting tile to verify that the waterproofing is functioning properly.
Ask your installer whether testing is appropriate for your specific system and project.
Choosing the Best Tile for a Sarasota Shower
There is no single "best" shower tile for every bathroom.
The right choice depends on your budget, design, maintenance preferences, shower size, floor configuration, and installation complexity.
Porcelain Tile
Porcelain is a popular choice for shower walls and floors.
Advantages include:
Durable surface
Wide range of styles
Many colors and patterns
Stone-look options
Wood-look options
Large-format options
Relatively easy routine maintenance
Large porcelain formats can create a clean, modern appearance with fewer grout joints.
However, large tile requires careful substrate preparation and accurate installation.
Ceramic Tile
Ceramic tile offers a broad range of colors, shapes, sizes, and finishes.
It can work especially well for:
Shower walls
Subway-tile designs
Decorative patterns
Accent walls
Traditional bathroom designs
Ceramic and porcelain are both excellent choices when the specific tile is appropriate for the intended application and installed correctly.
Natural Stone
Natural stone can create a high-end appearance.
Popular options include:
Marble
Travertine
Slate
Limestone
Granite
However, stone can require more maintenance than ceramic or porcelain.
Depending on the material, homeowners may need to consider sealing, cleaning products, staining, and long-term care.
Mosaic Tile
Mosaic tile is especially useful for shower floors because smaller pieces can accommodate changes in slope and provide many grout joints.
It is also useful for:
Shower niches
Accent strips
Borders
Decorative patterns
Feature walls
The tradeoff is that more grout means more joints to clean.
Popular Shower Tile Designs and Layouts
A good installer should think about design and installation together.
Subway Tile
A classic option that works with modern, transitional, coastal, and traditional bathrooms.
Common layouts include:
Running bond
Stacked
Herringbone
Vertical stack
Large-Format Tile
Large tile can create a sleek appearance with fewer grout lines.
It can be especially effective on shower walls.
However, large tile demands careful planning because walls must be sufficiently flat and cuts around niches, valves, corners, and other features become more visible.
Herringbone
Herringbone adds visual movement but requires more cutting and layout time.
It is a good example of a design choice that can increase installation labor without significantly changing the amount of tile.
Marble-Look Porcelain
This can provide the appearance of natural stone while offering the practical characteristics of porcelain.
Accent Wall
Instead of using expensive decorative tile throughout the shower, homeowners can use a premium tile on one wall or in the niche.
This can create a luxury appearance while controlling material costs.
Money-saving design strategy: Spend more on the areas people notice most, such as the main shower wall or niche, and use a simpler coordinating tile elsewhere.
The Shower Tile Installation Process
A professional shower project generally follows a logical sequence.
Step 1: Consultation and Measurements
The installer evaluates:
Shower dimensions
Existing conditions
Drain location
Plumbing
Wall conditions
Tile preferences
Niche or bench requirements
Shower door location
Accurate measurements are essential for estimating material quantities and planning the layout.
Step 2: Design and Tile Selection
Choose the tile, trim, grout, niche configuration, and other visible finishes.
This is also the time to discuss tile size.
Do not wait until installation begins to decide where decorative tile should go.
Step 3: Demolition
Old materials are removed as needed.
The goal is to expose enough of the existing assembly to determine whether the underlying structure is suitable for rebuilding.
Step 4: Substrate Preparation
The installer prepares a suitable, stable surface.
This may involve repairing framing, replacing damaged materials, correcting uneven surfaces, and preparing the shower area for waterproofing.
Step 5: Waterproofing
The waterproofing system is installed.
This stage should receive close attention because many shower failures originate from poor moisture management rather than from the visible tile itself.
Step 6: Shower Floor and Drain Preparation
The shower floor must direct water toward the drain.
The drain and waterproofing components need to work together as part of the complete assembly.
Step 7: Tile Layout
Before setting tile, the installer should determine:
Starting points
Centerlines
Corner cuts
Niche alignment
Decorative bands
Floor transitions
Tile orientation
A thoughtful layout can make a major difference in the finished appearance.
Step 8: Tile Installation
The tile is installed using the appropriate setting material and installation method.
Precision matters here.
The installer needs to control:
Tile alignment
Grout-joint consistency
Lippage
Cuts
Corners
Transitions
Step 9: Grouting and Sealant
Grout is installed after the setting material has properly cured.
Changes of plane and other appropriate joints may require flexible sealant rather than rigid grout.
Step 10: Final Inspection
The homeowner and installer should inspect the completed shower.
Look at:
Tile alignment
Grout consistency
Edge finishing
Fixture penetrations
Drain area
Niche
Corners
Caulked joints
Door or glass interface
How Much Does Shower Tile Installation Cost in Sarasota?
There is no reliable single price for every shower.
Two showers with similar dimensions can have very different project costs because of demolition, waterproofing, tile selection, plumbing changes, layout complexity, and substrate repairs.
Local Sarasota tile companies publish different pricing structures, and some distinguish between installation labor and materials.
The best way to compare prices is to request a written, itemized estimate.
A shower tile estimate may include:
Cost CategoryWhat Can Affect ItDemolitionExisting tile, pan, walls and disposalSurface preparationRepairs, leveling and substrate workWaterproofingSystem, size and complexityTileMaterial, size, brand and availabilityLaborShower size and installation complexityLayoutStraight pattern vs. intricate patternNichesNumber, size and custom detailingBenchBuilt-in construction and waterproofingPlumbingMoving or replacing fixturesDrainStandard, linear or specialty drainGroutStandard or specialty groutTrimMetal, stone or ceramic edgingGlassShower door and enclosurePermitsScope and local requirements
Be cautious about comparing quotes based on one number alone.
A $5,000 estimate and a $9,000 estimate may not represent the same scope of work.
What Makes Shower Tile Installation More Expensive?
Several factors can increase labor and material costs.
Complex Tile Patterns
Herringbone, intricate mosaics, borders, and detailed patterns require more layout and cutting.
Large-Format Tile
Large tile can reduce grout lines but may require additional handling, preparation, and precision.
Natural Stone
Natural stone may require specialized cutting, installation techniques, and ongoing maintenance.
Shower Niches
A niche adds functionality, but it also introduces additional corners, waterproofing transitions, and detailed tile cuts.
Curved or Angled Walls
Non-standard geometry increases layout and cutting complexity.
Plumbing Changes
Moving a shower valve or drain can turn a straightforward tile project into a larger remodeling project.
Hidden Damage
Once demolition begins, water damage, deteriorated framing, or previous installation problems may be discovered.
A professional estimate should explain how unexpected conditions are handled before they become expensive surprises.
How to Choose a Shower Tile Installer in Sarasota
Choosing an installer should involve more than searching for the lowest estimate.
Use this process.
1. Look at Actual Shower Projects
Ask to see completed shower installations.
Pay attention to:
Straight grout lines
Consistent joints
Clean corners
Quality cuts
Niche detailing
Floor slope
Overall symmetry
Close-up photos are especially valuable.
2. Ask About Waterproofing
This should be one of your first questions.
Ask:
"What waterproofing system will you use, and what does the complete assembly include?"
A professional should be able to explain the answer.
3. Ask Who Performs the Work
Will the person who gives you the estimate install the shower?
Will subcontractors perform the tile work?
Who handles plumbing?
Who handles glass?
Clear responsibility reduces confusion.
4. Request an Itemized Estimate
The estimate should make it clear what is included.
Look for:
Demolition
Preparation
Waterproofing
Tile installation
Grouting
Trim
Cleanup
Materials
Additional trades
5. Check Licensing and Insurance
Florida's Department of Business and Professional Regulation explains that some construction work requires state licensing while certain work, including tile, may not require a state contractor license.
That distinction is important.
Do not assume that "licensed" on a website tells you everything you need to know.
For projects involving multiple trades, ask who is responsible for each regulated portion of the work and verify the appropriate credentials.
6. Check References and Reviews
Look for feedback that specifically mentions:
Shower work
Bathroom remodeling
Waterproofing
Communication
Cleanliness
Schedule
Quality after completion
A generic flooring review is less useful than a review from a homeowner who had a complete shower installed.
Questions to Ask Before Hiring a Tile Installer
Use these questions during your estimate.
How will the shower be waterproofed?
What waterproofing system do you use?
Will you inspect the substrate after demolition?
How do you handle shower niches?
How will the shower floor be sloped toward the drain?
Who handles plumbing changes?
Who purchases the tile?
Who is responsible if extra material is needed?
How do you handle damaged framing discovered during demolition?
What is included in the estimate?
How long should the project take?
What warranty or workmanship guarantee is provided?
Can I see recent shower projects?
Who will be working in my home?
Are permits required for the scope of my project?
The answers can tell you a lot about the installer's experience.
Common Shower Tile Installation Mistakes
Mistake #1: Treating Tile as Waterproofing
Tile and grout are the visible finish, not the entire moisture-management system.
Mistake #2: Skipping Proper Surface Preparation
Even excellent tile can look poor when installed over an uneven surface.
Mistake #3: Choosing Tile Before Planning the Layout
A beautiful tile can produce an awkward result if the layout creates tiny slivers at corners or around fixtures.
Mistake #4: Ignoring the Shower Floor
The floor needs appropriate drainage and a suitable surface for the selected tile.
Mistake #5: Using Too Many Design Elements
Mixing multiple tile sizes, patterns, accent strips, and materials can make a small bathroom look visually busy.
Mistake #6: Choosing Based Only on Price
A low quote may exclude demolition, waterproofing, substrate repair, or other essential work.
Mistake #7: Failing to Plan Niches Early
Niches should be incorporated into the waterproofing and tile layout rather than treated as an afterthought.
Mistake #8: Hiring the Wrong Contractor for the Scope
If your project includes plumbing, electrical work, structural changes, and tile installation, make sure each portion is being performed by appropriately qualified professionals.
Ceramic vs. Porcelain vs. Natural Stone
FeatureCeramicPorcelainNatural StoneDesign varietyExcellentExcellentExcellentDurabilityVery goodExcellentVariesMaintenanceGenerally easyGenerally easyOften higherLarge formatsAvailableWidely availableAvailableStone appearanceLimited/printedExcellent optionsAuthenticTypical useWalls and many floorsWalls and floorsWalls, floors and featuresMaintenance concernsLow to moderateLowMaterial-dependentBest forVersatile designsDurable modern showersLuxury natural look
The right selection depends on the individual product and its suitability for the intended application.
A knowledgeable installer can help you evaluate not just appearance, but also maintenance and installation requirements.
Sarasota-Specific Remodeling Considerations
Sarasota homeowners should not assume that every bathroom project follows exactly the same permitting process.
The applicable requirements can depend on the property's jurisdiction and the scope of work.
The City of Sarasota maintains a Building & Permitting division and provides residential remodeling information, permit applications, inspections, and code resources.
Sarasota County also provides permitting, inspection, contractor licensing, and enforcement services. The county advises property owners to make sure contractors are appropriately licensed and insured for the work being performed.
The county also notes that Florida permitting rules changed in 2026, including exemptions for certain types of work under specific conditions. That does not mean every shower remodel is automatically exempt. The exact scope and circumstances matter.
Best practice: Before starting a major bathroom renovation, ask your installer or remodeling contractor who is responsible for determining permit requirements and obtaining any permits that apply.
Do not rely on an internet article to make the final permitting determination for your particular property.
Shower Tile Installation Checklist
Before hiring your Sarasota shower tile installer, confirm that you have discussed:
Design
Shower dimensions
Tile type
Tile size
Tile color
Grout color
Tile pattern
Accent tile
Niche
Bench
Shower curb
Drain style
Shower door
Installation
Demolition
Substrate preparation
Waterproofing system
Shower pan/base
Drain connection
Wall tile
Floor tile
Grouting
Flexible sealant where appropriate
Final cleanup
Contractor
Written estimate
Scope of work
Payment schedule
Project timeline
Insurance
Appropriate licensing/registration
References
Warranty
Permit responsibility
Advanced Strategies for a Better Shower
If you are investing in a custom shower, small planning decisions can make a major difference.
Align the Niche With the Tile
A niche that follows the surrounding tile grid looks more intentional than one awkwardly positioned between cuts.
Keep the Design Simple
One premium accent can be more effective than five competing materials.
Use Larger Tile Strategically
Large wall tile can reduce visual clutter.
However, the substrate needs to be properly prepared, and the tile must be appropriate for the installation.
Choose Grout Carefully
Grout color changes the appearance of the entire shower.
A contrasting grout highlights the tile pattern.
A coordinating grout creates a more seamless appearance.
Plan for Maintenance
Consider how many grout joints your design creates.
More grout can mean more cleaning.
Think About Aging in Place
If accessibility is important, consider features such as:
Low-threshold entry
Grab-bar reinforcement
Built-in seating
Handheld shower
Easy-to-reach controls
Slip-conscious flooring
These decisions are easiest to incorporate during construction.
A Real-World Example: Comparing Two Shower Quotes
Imagine two Sarasota homeowners receive estimates for a similar shower.
Estimate A
Tile installation
Basic preparation
Standard grout
Cleanup
Estimate B
Demolition
Substrate inspection
Complete waterproofing system
Shower pan preparation
Drain integration
Large-format tile installation
Custom niche
Premium grout
Detailed finishing
Final walkthrough
Estimate A may look cheaper.
But the homeowners are not actually comparing equivalent projects.
This is why scope matters more than headline price.
The best quote is not necessarily the lowest one. It is the one that clearly defines what will be built, how it will be built, what materials are included, and who is responsible for each part.
Common Myths About Shower Tile
Myth: "The tile makes the shower waterproof."
Reality: Tile is a finish surface. A properly designed waterproofing system is required to manage moisture behind the tile.
Myth: "More expensive tile always means a better shower."
Reality: Installation quality and the underlying shower assembly are critical. An expensive tile installed poorly is still a poor installation.
Myth: "Large tile is always cheaper because there are fewer pieces."
Reality: Fewer pieces can mean fewer grout joints, but large tile may require more preparation and careful handling.
Myth: "Every bathroom remodel needs the same permits."
Reality: Requirements depend on jurisdiction and scope. Sarasota County and the City of Sarasota maintain their own permitting resources and requirements.
Myth: "A shower renovation is only about tile."
Reality: A complete shower can involve demolition, plumbing, waterproofing, substrate preparation, drainage, tile, grout, fixtures, glass, and finishing work.
Future Trends in Sarasota Shower Design
Bathroom design continues to move toward cleaner, more personalized spaces.
Some trends worth considering include:
Large-Format Porcelain
Fewer visual interruptions and a contemporary appearance.
Curbless Showers
A cleaner transition between the bathroom floor and shower.
Linear Drains
A minimalist alternative to conventional center drains.
Built-In Niches
Storage integrated directly into the shower wall.
Warm Neutral Colors
Soft beige, sand, stone, and natural tones remain versatile choices for coastal and contemporary interiors.
Spa-Inspired Features
Homeowners are increasingly incorporating:
Handheld showers
Rain showerheads
Built-in benches
Multiple niches
Larger shower footprints
The best trend is one that works for your home and remains functional after the trend disappears.
Frequently Asked Questions
1. How do I find a good shower tile installer in Sarasota?
Look for an installer with recent shower-specific experience, strong reviews, clear estimates, appropriate insurance and credentials, and a waterproofing process they can explain clearly.
2. How much does a tiled shower cost in Sarasota?
There is no universal price. Cost depends on shower size, demolition, waterproofing, tile, layout, plumbing, substrate condition, niches, drains, and other features. Request an itemized estimate for an accurate project price.
3. Is shower waterproofing really necessary?
Yes. Tile and grout should not be relied upon as the complete waterproofing system. The shower needs an appropriate moisture-management assembly behind or beneath the tile.
4. What is the best tile for a shower?
Porcelain, ceramic, and natural stone can all be suitable depending on the specific product, location, design, maintenance requirements, and installation method.
5. How long does shower tile installation take?
The timeline varies significantly. A simple tile replacement may be relatively quick, while a complete shower rebuild involving demolition, waterproofing, plumbing, tile, and glass can take considerably longer.
6. Should I replace the shower or just retile it?
If the existing waterproofing and shower structure are sound, retile-only work may make sense. If there are leaks, deteriorated materials, poor drainage, or outdated waterproofing, rebuilding the shower may be the better long-term solution.
7. Is porcelain better than ceramic for a shower?
Not automatically. Both can be excellent choices. The specific tile, intended application, design, maintenance requirements, and quality of installation all matter.
8. Can I use large-format tile in a shower?
Yes, large-format tile can create an attractive modern appearance. It requires careful substrate preparation, handling, layout, and installation.
9. Do I need a shower niche?
No. A niche is optional. However, it can provide convenient storage without adding a freestanding shelf to the shower.
10. Do I need a permit for a shower remodel in Sarasota?
It depends on the property location and the scope of work. The City of Sarasota and Sarasota County provide official permitting information, and requirements can change based on the type of work being performed.
11. Should I get multiple estimates?
Yes. Comparing two or three detailed estimates can help you understand differences in materials, waterproofing, labor, scope, and schedule.
12. What should I ask a tile installer first?
Start with: "How will you waterproof my shower?"
The answer can reveal whether the contractor is thinking about the complete shower assembly rather than only the visible tile.
Internal Linking Suggestions
A website targeting Sarasota homeowners could strengthen this article with contextual internal links to related pages such as:
Bathroom Remodeling in Sarasota: Complete Homeowner Guide
How Much Does a Bathroom Remodel Cost in Sarasota?
Walk-In Shower Remodeling in Sarasota
Porcelain vs. Ceramic Tile: Which Is Better?
How Shower Waterproofing Works
Best Shower Tile Ideas for Florida Bathrooms
Large-Format Tile Installation Guide
Bathroom Tile Installation in Sarasota
Custom Shower Design Ideas
Tile Flooring Installation in Sarasota
Use descriptive anchor text rather than repeatedly linking with phrases such as "click here."
City of Sarasota Building & Permitting
Useful for homeowners whose property falls within the City of Sarasota jurisdiction. The city provides permit applications, inspection information, building-code resources, and residential remodeling materials.
City of Sarasota Building & Permitting
Sarasota County Building Division
Useful for properties under Sarasota County jurisdiction. The county provides information about permitting, inspections, contractor licensing, and enforcement.
Sarasota County Building Division
Tile and Shower-System Manufacturer Documentation
When a particular waterproofing system is specified, homeowners should be able to review the manufacturer's installation instructions. For example, Schluter publishes detailed shower-system and installation resources.
Schluter Shower System Resources
Key Takeaways
If you are searching for a shower tile installer in Sarasota, remember these points:
Waterproofing comes before tile.
Do not compare estimates by price alone.
Ask exactly how the shower will be waterproofed.
Look at completed shower projects, not just flooring work.
Get the scope of work in writing.
Confirm who handles plumbing, demolition, glass, and other trades.
Choose tile based on appearance, maintenance, durability, and installation requirements.
Plan niches, drains, benches, and tile layouts before installation begins.
Ask about insurance, licensing or registration requirements applicable to the project.
Check City of Sarasota or Sarasota County permitting requirements based on the property's jurisdiction.
A quality installation should focus on both what you see and what you cannot see.
Final Recommendations
A shower is one of the most demanding tile installations in a home because it combines constant moisture with detailed construction and finishing requirements.
That makes the installer you choose just as important as the tile you purchase.
Before signing a contract, look beyond the showroom sample. Ask about waterproofing. Ask about substrate preparation. Ask how the drain and shower floor will be handled. Ask who is responsible for plumbing and permits. Request a detailed estimate. And, most importantly, ask to see examples of completed shower projects.
For Sarasota homeowners, the best shower tile installer is not simply the contractor who offers the lowest price or the most impressive tile selection. It is the professional who can explain the entire installation from the structure underneath the tile to the final grout joint.
A successful shower should look beautiful on day one and continue performing long after the renovation is finished.
If you are planning a shower renovation, start by defining your priorities—design, durability, accessibility, maintenance, budget, or all five. Then compare qualified local installers based on their process, experience, scope of work, and ability to build a properly waterproofed shower.
The right preparation can turn a bathroom renovation from a stressful expense into a long-term improvement you enjoy every day.